
Key takeaway: OTT Navigator is a free IPTV player with a real TV guide and strong support for large playlists. Install the official standalone version with Downloader, add your provider and reload the guide.
OTT Navigator sits nicely between IPTV Smarters Pro and TiviMate. It is free to use, has a real TV guide, handles very large playlists well and supports three login types: Xtream Codes, M3U and Stalker portals. Optional Premium features exist, but you do not need them to watch.
This guide walks you through OTT Navigator from install to a working guide on Fire TV, with notes for Android TV, the settings that matter and fixes for the common problems.
Good to know: like every player, OTT Navigator has no channels of its own, so you need a subscription from an IPTV service.
In this guide
What you need
- A Fire TV running Fire OS with Downloader installed (Vega OS models such as the 4K Select cannot install it); see Downloader on Fire TV
- Your login: Xtream Codes details, an M3U link or a Stalker portal
- About ten minutes
On Android TV? OTT Navigator is available in Google Play there, so you can skip the download step; see IPTV on Android TV.
Step 1: Install the official version
OTT Navigator is not in the Amazon Appstore. Instead, the developer offers a standalone version for Fire TV, as listed in the official OTT Navigator FAQ.
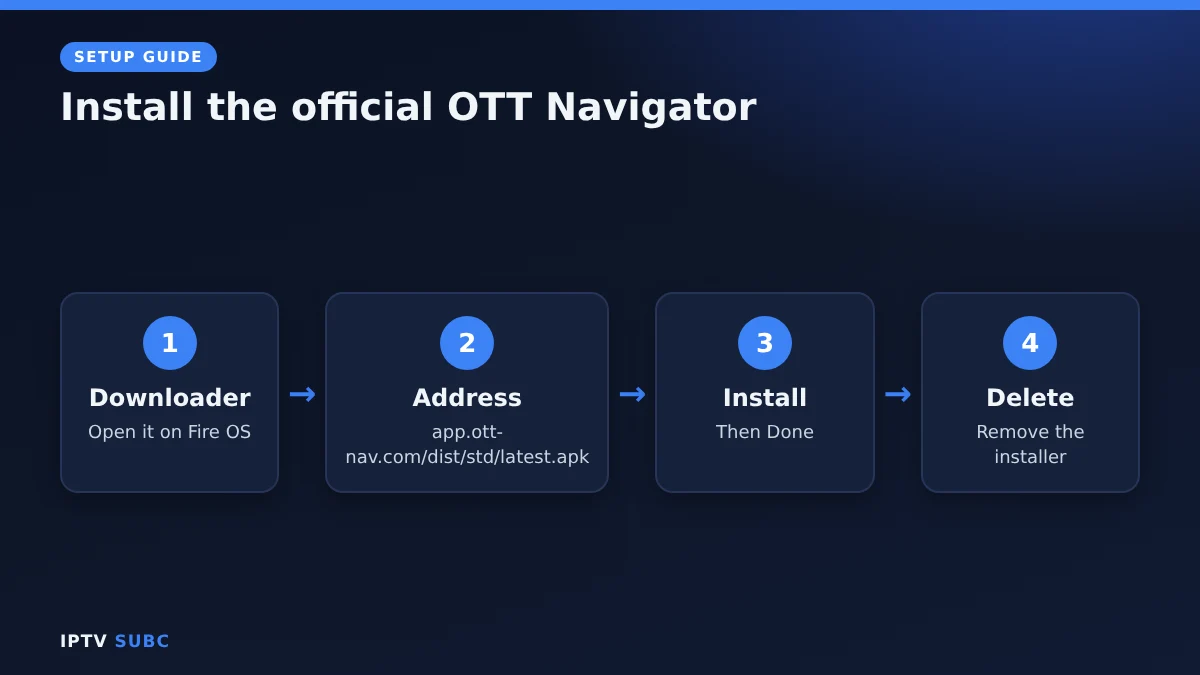
- Open Downloader.
- Type this address in the address bar: app.ott-nav.com/dist/std/latest.apk
- Select Go and wait for the download.
- Select Install, then Done.
- Select Delete to remove the installer file.
Avoid “modded” or “premium unlocked” copies from other websites. They are unofficial, may contain malware and break when the app updates.
Step 2: Add your provider to OTT Navigator
- Open OTT Navigator and accept the permissions it asks for.
- When it asks for a provider, choose the type that matches your login.
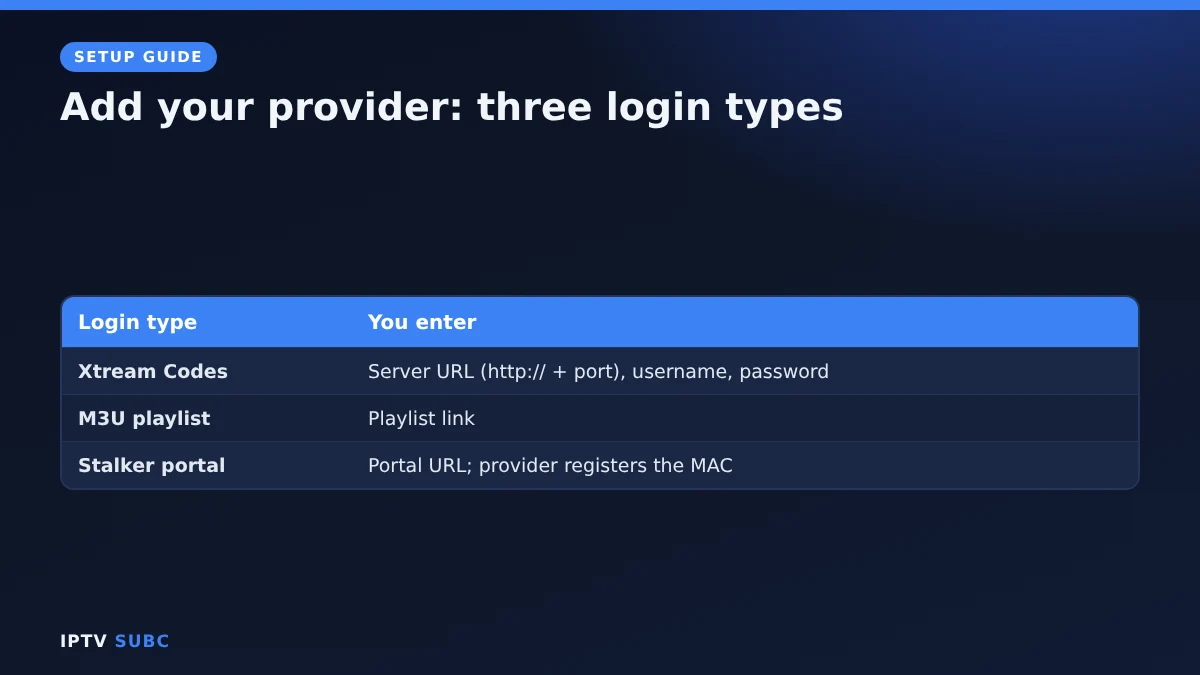
- Xtream Codes: enter the server URL (with http:// and the port), username and password.
- M3U: choose the playlist option and paste the link.
- Stalker portal: enter the portal URL your provider sent; they will need the MAC address the app shows.
- Name the provider and confirm. The channels now load.
Not sure which to pick? Our guide to M3U vs Xtream Codes explains the difference. In short, choose Xtream Codes whenever you have it.
Step 3: Load the guide
With Xtream Codes, the guide usually loads by itself. To check, go to Settings, EPG, Reload. With an M3U playlist, add the guide link under Settings, Provider, Parameters, EPG. For more detail, see IPTV EPG setup.
OTT Navigator settings that help
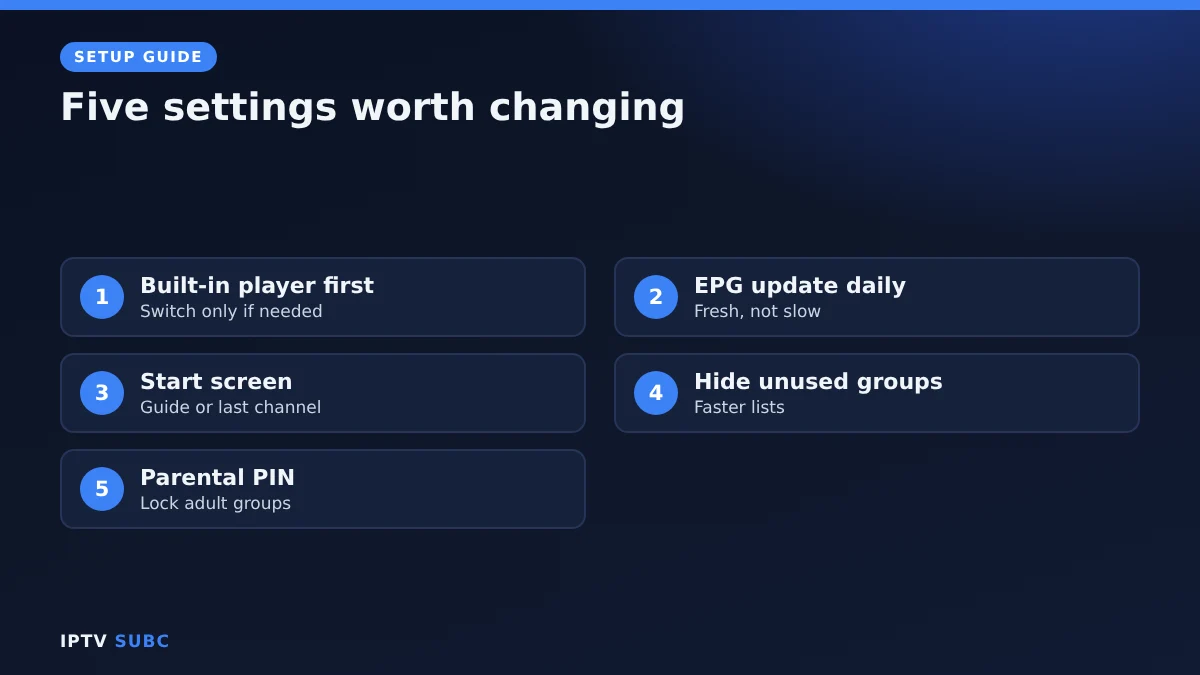
| Setting | Recommended | Why |
|---|---|---|
| Player | Built-in player first | Switch only if a channel stutters |
| EPG update | Once a day | Fresh guide without slowing the stick |
| Start screen | TV guide or last channel | Gets you watching faster |
| Hidden groups | Hide groups you never watch | Shorter lists load faster |
| Parental control | Set a PIN for adult groups | Keeps the family profile safe |
Setting names may differ slightly by version, but all of these are in the main Settings menu.
Is Premium worth it?
For most people, the free version is enough for live TV, films and the guide. Premium adds extras such as more profiles and device management. On Fire TV, Premium is managed through the developer’s OttNav Companion app, and one purchase covers several devices. Try the free version first and check the current price in the app before buying.
OTT Navigator or another player?
- Choose OTT Navigator if you want a strong free player, use a Stalker portal or have a very large playlist.
- Choose TiviMate for the most polished guide and recording with Premium; see TiviMate on Fire TV.
- Choose IPTV Smarters Pro if you mostly watch films and series.
Troubleshooting
| Problem | Fix |
|---|---|
| Downloader shows an error | Check the spelling, including /dist/std/latest.apk; confirm Downloader may install apps |
| “Invalid login” when adding the provider | Retype the details; the server URL needs http:// and often a port |
| Empty TV guide | Settings, EPG, Reload, then restart the app |
| Channels buffer | Try another player in the settings, then follow our IPTV buffering fixes |
| App slow with a huge playlist | Hide unused groups and clear the cache |
The original lesson is OTT Navigator on Firestick on Legion Webs.
Your provider’s own guides can help with the login step; the 4KFlexHub installation tutorial is one example.
FAQ
Is OTT Navigator free?
Yes. You can watch for free; Premium is optional.
Is OTT Navigator better than TiviMate?
TiviMate has the more polished guide and recording. OTT Navigator is free, handles Stalker portals and copes well with large playlists.
Does OTT Navigator include channels?
No. It is a player only.
Does it work on the Fire TV Stick 4K Select?
No. The 4K Select runs Vega OS, which cannot install it.
Can I use it on several devices?
Yes. Install it on each device and add your login, within your plan’s connection limit.
Next steps
Compare all players in best IPTV player for Fire TV, or protect your streams with a VPN on Fire TV.